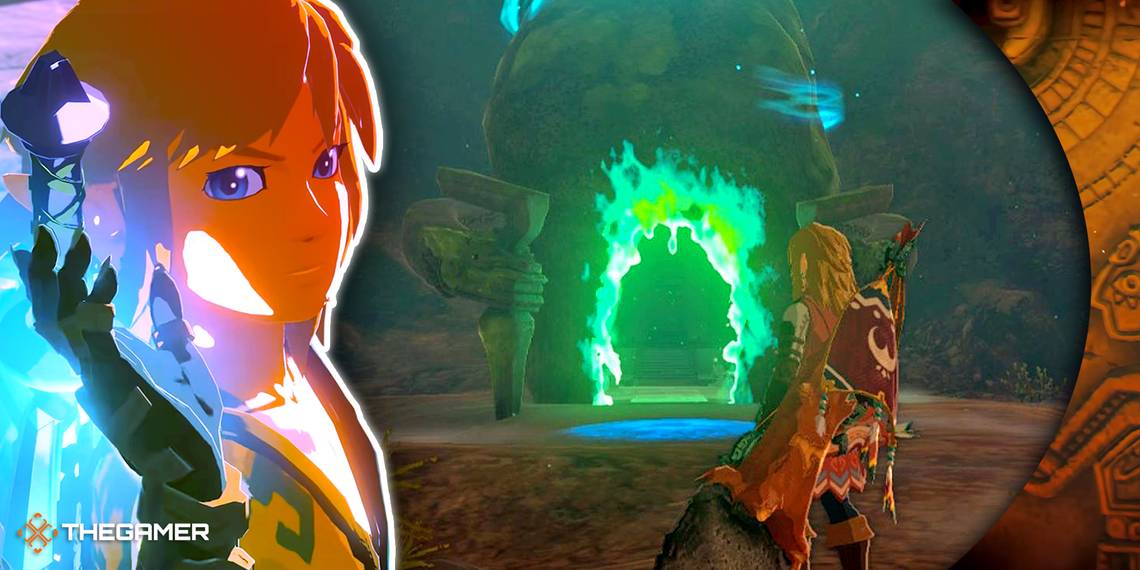
As you explore the vast world of The Legend of Zelda: Tears of the Kingdom, you will run into many Shrines that draw your attention to it with its bright green and blue lights that swirl around it as you anticipate what puzzles or trials await you when you enter.
However, some Shrines won't have any challenge or puzzle to solve inside of it, as just reaching it serves as the trial itself. This is precisely what the Taki-ihaban Shrine offers, which can be found within a Cave near Lindor's Brow Skyview Tower!
Taki-ihaban Shrine (Rauru's Blessing) Location Walkthrough

The Taki-ihaban Shrine is found in the Lindor's Brow region next to the area's Skyview Tower. As covered above, the Shrine itself has no puzzles or challenges other than finding and reaching it, which we will cover in the sections below!
If you don't have the Lindor's Brow Skyview Tower activated yet, we strongly suggest doing that before you continue with the guide, as we will be using it as the starting point for finding the Shrine!
Taki-ihaban Shrine: Lindor's Brow Cave Entrance Location


Before you can find the Taki-ihaban Shrine, you must first find Lindor's Brow Cave, located just southeast of the Skyview Tower. To reach it quickly, fast-travel to the Tower and Glide off the cliffside directly in front of you when you spawn in.
As you begin Gliding, keep an eye out for a hole in the ground found on a large rock. Glide down through this hole and land on the floor beneath it. Do not continue Gliding out of this area, or you will completely miss the Cave's entrance!
Taki-ihaban Shrine: Entering Lindor's Brow Cave


After landing on the ground beneath the hole, turn around to find another hole that leads further into the cliffside. Drop down onto the small ledge beneath you to find an even deeper tunnel that leads straight down into the Cave.
Jump down into the hole, open your Glider, and Glide down to the bottom of Lindor's Brow Cave. Once you land, you will be very close to the Taki-ihaban Shrine, but you must be careful when progressing!
Taki-ihaban Shrine Location And Gloom Hands


Once you're finally in Lindor's Brow Cave, you will land in a small pool of water and see a pathway leading further into the Cave. You can collect several things here, including Bomb Flowers and Brightcaps, collect these and continue following the path.
The Cave will eventually open up, revealing the Taki-ihaban Shrine on top of an elevated portion of the Cave. However, as you approach the Shrine, Gloom Hands will appear out of the ground and begin to pursue you almost immediately.
Here, you can simply run straight ahead and quickly scale the wall and reach the Shrine, or you can stay and fight them. If you have yet to encounter Gloom Hands, they can be rather challenging, especially early on, so we suggest avoiding them altogether if you lack upgrades and weapons.
Furthermore, defeating the Gloom Hands will spawn a Phantom Ganon, so be prepared for an even tougher battle if you decide to take them on. Again, we only suggest fighting these enemies if you are equipped to do so. Otherwise, just avoid them and beeline to the Shrine!
Taki-ihaban Shrine Rewards

Whether you fought the Gloom Hands and Phantom Ganon or avoided them like the plague, entering the Taki-ihaban Shrine will be relieving after hearing the creepy music accompanying them.
Furthermore, there's nothing to do here except crack open the Treasure Chest at the beginning of the Shrine and receive your Light of Blessing.
Opening the Chest will reward you with one Large Zonai Charge, which can be used in the Zonai Device Dispenser or temporarily give a Zonai Energy Cell extra power, allowing it to stay active a little bit longer than usual!