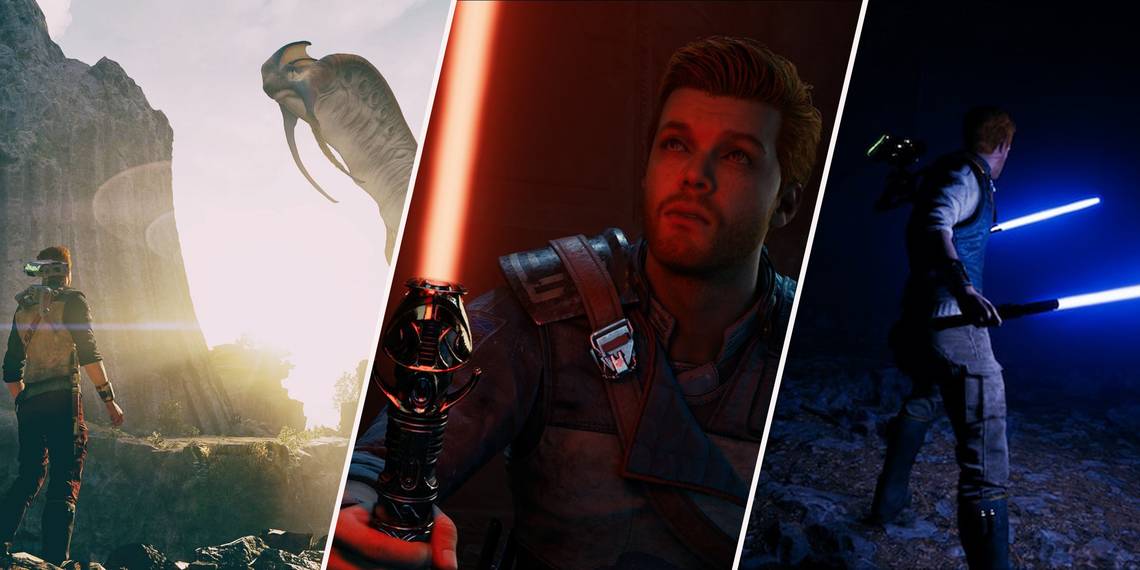
There is a lot to see in Star Wars Jedi: Survivor, from its beautifully scenic planets of Koboh, Jeda, and Courscant, to its magnificent bosses and enemy types. There is a lot to do in this world too, finding collectibles, repopulating Pyloon’s Saloon, playing holotactics, gardening, and puzzle solving.
If there is one thing to love about Metroidvania games, it is secret areas. There are a lot of hidden areas in Star Wars Jedi: Survivor. These areas are intricately designed, with a lot to find and a lot to fight. Here are the ten best-hidden areas in Jedi: Survivor that everyone has completely missed out on!
10 Doma’s Shop Closed Door

This is one of the simplest ones out there, all you need to unlock this area are ten Priorite Shards. You can find Priorite Shards by exploring and finding them on Koboh, and once you’ve acquired them, you can head back to Doma’s Shop and purchase the mysterious keycode so you can unlock the closed door there.
Approach the door and let BD open it for you. Once inside the room, you can turn to the right to find a Stim Cannister Upgrade located there.
9 The Pit of the Spawn of Oggdo

Head to Fort Kahlin and go up to the second floor until you reach a platform full of droids. They are standing on something that looks like a helipad, and once you reach them and defeat them, go towards the Priorite Shard that’s in the center of the helipad.
It will open up like elevator doors, and you will fall in. This is where you encounter the Spawn of Oggdo.
This is an incredibly dangerous boss, one that will require you to use those pro-player movements and mechanics. Your reward for completing this is a glorious return to Ponchos, along with that Priorite Shard that you wanted so bad you had to fight a monster to get it.
8 The Crypt of Uhrma

On Jedda, there aren’t many enemies as genuinely terrifying as the Sutaban. Of course, you can take on Sutabans all day long, but you cannot take on the Sutaban Alpha without preparing yourself mentally and physically.
The Crypt of Uhrma is the hidden location that features this enemy, and once you reach it, you get to solve a mind-numbing riddle that unlocks a stim upgrade and a path.
Take the path until you reach two rock formations where you can squeeze through, here you will find the lair of the Sutaban Alpha. This is a tough boss fight, hidden in an area protected fully by an incredibly difficult riddle, so what’s not to love?
7 The Mire Terror’s Domain

At one point in the game, the story will take you to a huge swamp area where you will find the Luchrehulk. However, aside from that monstrosity turned fortress, hidden in the swamps is also the Mire Terror’s Domain.
The Mire Terror is one of the game’s most annoying enemies amped up to 100% of its power. Not to mention, the Mire Terror also has a Mogu buddy with it, which makes the battle even harder.
This area can be found once you’re at the top of where Wini and Zygg are located, which can only be accessed once you have the Force Lift ability. After that, you will use a bunch of ziplines, until you find your feet dug into the swamp, and must run for your life to reach the platform.
A little platforming from there and you will find yourself on the Mire Terror’s swamp island. Once you beat them, you can collect a Stim Cannister Upgrade right there.
6 Vashtan Wolfe’s Door
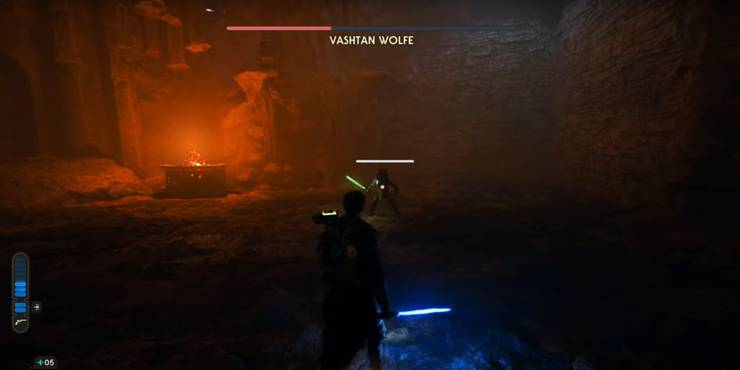
In the Derelict Dam region, there is a particular area that will lead you to a system of caves, where if you head to the right side, you will find yourself in Vashtan Wolfe’s lair. This is a large cave structure, with a huge door in the center.
This hidden area is home to Vashtan Wolfe, a mercenary legend who has somehow found himself here. There is also a chest there, but it requires you to unlock the Electro Dart feature for BD.
Once you have that, you can simply use it on the Electric Cylinder hanging above in the cave, and see Vashtan Wolfe jump right out of the door. There you can fight him, and he’s a mean one, with a lightsaber, a blaster, and even a cloaking device to make him invisible.
Once you’ve defeated him, you can get the chest in the room. You’ll gain Weapon Materials Two-Tone Metal and BD-1 Materials Anodized Metal for your troubles.
5 Sodden Grotto

This optional area is located in the Southern Reach of Koboh. This area is home to cave diving, many dangerous enemies, a ton of collectibles to find, and a terrifying Rancor.
This Rancor is one that is filled with aggression, but you can take it on even during the early game. Just be sure that it doesn’t hit you with those unlockable attacks, as that can result in instant death.
This is a fairly large area compared to some of the ones mentioned previously, as it offers a lot of exploration, platforming, and collectible collection. It’s also not too hard to find, even though it is a hidden area, it’s most likely going to be found by just exploring the brand-new scenic location of Koboh that you find yourself in.
4 The Raider Watchtower

You can find this area through a rumor as well, but this is one area where you won’t expect the amount of blaster fire that you will have to block. The Raider Watchtower is filled to the brim with droids, and just when you think you’ve got them all, there are more that wake up every time you try to explore it.
This area is on top of a very tall hill and can be reached once you’re at the top of the Harvest Ridge Barn.
This area can be found on your own, or through a rumor that leads you to it. It’s a particularly tricky one to get to, especially if you haven’t been there before you get the rumor.
It’s got a ton of fighting for you to do, along with a great upgrade that will definitely help you out in the long run.
3 Harvest Ridge Barn

The Harvest Ridge Barn has a lot to offer, from a well-designed puzzle that involves Nekkos and an elevator to a bunch of enemies to fight, a great meditation point, and a ton of upgrades and cosmetics. This area is not particularly difficult to find, but you will have to make your way through some of the more difficult-to-navigate areas on Koboh.
Once you reach it, you get to fight a bunch of raiders and droids, after which you are free to do the puzzle. There's a lot to this puzzle, opening doors, doing Nekko double jumps, and even getting a Nekko onto an elevator so you can reach a tall platform.
This area has a lot of fun stuff to offer, so it’s a definite fun one.
2 The Winding Ravine

The Winding Ravine can be found through a rumor known as Secrets of the Gorge. You will have to tame the brilliantly large dinosaur, after which you can climb onto its tusk so it can take you to the entrance to the Ravine.
There aren’t any boss fights here, and the enemies are quite simple to beat, but there are a lot of Priorite Shards to find here, along with a couple of cosmetics and upgrades.
This area is hard to find, it’s tricky to even understand that Cal can mind control an animal of that size. However, he can, and once you get into the Ravine, it’s a simple puzzle platforming routine until you find all of the unlocks.
There is a large Gorocco that you get to fight once you reach the top, after which you get to fly and unlock a Golden Chest.
1 The Phon’Qi Caverns

The Phon’Qi Caverns is by far the largest and most meticulously crafted hidden location in Star Wars Jedi: Survivor. These are located beneath The Abandoned Shack, which you will reach through a rumor.
On the back side of the building, after force-pulling the basement door, you will find yourself heading down there. It’s a location with a ton of mini-bosses, a plethora of collectibles, map upgrades, BD upgrades, and of course, even a Rancor boss fight.
This particular area was a highlight and one of the most challenging to find in the game. You will most likely miss it unless you're a curious mind and choose to force-pull every single metal plate around the abandoned shack.
Not to mention, it has a bunch of saber duels waiting for you, which is always a fun engagement to have.